Showing posts with label cakes. Show all posts

Sunday, 10 August 2014

Iced Cherry Cake (as seen on Great British Bake Off)

If you live in the UK I am sure you are watching the new series of the BBC's Great British Bake Off. Each week they have a technical challenge and so I have decided to make these myself and video it and give you the recipe used on the show.

The first challenge was to make a cherry cake with lemon icing.  This is fairly straightforward cake but using a savarin mould and then adding lemon icing and decorating with cherries and almonds makes it looks great.


To watch a  video of me making the cherry cake, please click on the video below:


Equipment required:
Large mixing bowl
23cm/9inch savarin mould tin
Sieve
Electric mixer

The recipe :
Cherry Cake
200g (7oz) glace cherries
225g (8oz) self-raising flour
175g (6oz) softened butter
175g (6oz) caster sugar
1 lemon - zest only
50g (1 3/4 oz) ground almonds
3 eggs

Preheat the oven to 180 degrees centigrade (350 fahrenheit or gas mark 4). Brush melted butter over the savarin mould.

Cut the cherries into halves or quarters and then put in a sieve and rinse under running water.  Drain well and then dry using kitchen roll and then toss in two tablespoons of flour.

Put all other ingredients in a bowl and mix well with an electric mixer (or by hand). Fold in the cherries.  Spoon into the tin and spread evenly.

Bake for around 35 minutes until golden-brown and a cake tester comes out clean.  Leave to cool in the tin for 10 minutes and the turn out onto a wire rack. Do not ice until completely cool.

Icing
175g (6oz) icing sugar
juice of one lemon
15g flaked almonds
5 glace cherries

Lightly toast the almonds in a pan until lightly brown (be careful they don't burn) and set aside. Cut the cherries in half.  To make the icing mix the icing sugar with some of the lemon juice - adding a bit at a time until the icing gets to a nice thick consistency.  Drizzle thickly over the cake and decorate with the almonds and cherries.

Sunday, 4 August 2013

Swiss roll


It appears that the swiss roll does not have its origins in Switzerland although it is thought to have have come from Europe.  Also known as a 'jelly roll' it is a fatless sponge filled with jam and sometimes cream and rolled.  In fact it could be filled with a whole number of fillings such as jam, fresh cream, buttercream, lemon curd or chocolate buttercream.  In the recipe below I make a simple jam swiss roll.


To watch a  video of me making the swiss roll please click on the video below:


Equipment
Large mixing bowl
Electric mixer
Sieve
Swiss roll tin 25cm X 38cm (approx 10 inches by 15 inches)
Greaseproof paper


Swiss roll
125g (4 1/2 oz) caster sugar
4 eggs
125g (4 1/2 oz) plain flour
2 tablespoons warm water
1 teaspoon vanilla extract
4 tablespoons raspberry jam

Preheat the oven to 190 degrees centigrade (375 fahrenheit or gas mark 5). Brush melted butter over the swiss roll tin.  Then put greaseproof paper in the tin ensuring that it comes up the side also.  Brush further melted butter on the greaseproof paper.

Beat together the eggs and the sugar for a few minutes until it has more than doubled in volume and is very fluffy.  Then add in the warm water and vanilla essence and stir in.  Sift half of the plain flour in to the batter and carefully fold in.  Add the remaining flour and fold in ensuring all the flour is well mixed in.

Pour into the tin ensuring the whole tin is covered but be careful not to use too pressure on the batter as you need to keep the air in the sponge.  Bake in the oven for 12-15 minutes until the sponge is springy and starting to brown.

While it is cooking cut a large piece of greaseproof paper (bigger than the swiss roll tin) and spread with caster sugar.  Also put a  clean tea towel under the tap and then wring out so it is damp still.

When the swiss roll is cooked turn it out onto the sugared greaseproof paper and carefully remove the greaseproof paper from the base of the swiss roll.  Place the damp tea towel over the sponge and leave to cool for 30 minutes.  This will help the sponge stay flexible for rolling.

When cool, spread around 4 tablespoons of jam on the sponge.  The thickness is a little thicker than you may have on toast.  Ensure the jam goes right to the edge of the sponge.  Then start rolling the swiss roll. For the first roll make it nice and neat and keep the greaseproof paper on to start with. Then peel back the paper and continue rolling the sponge. Don't worry if there is the occasional crack but keep rolling.  Using a sharp knife cut the ends off and you will be left with a nice neat swiss roll.

You could also add buttercream as well and you can see my recipe for buttercream I use for a Victoria Sponge here - be careful not to spread it too thick however.

Sunday, 12 May 2013

Carrot cake with maple buttercream


I have previously posted a carrot cake recipe but came across this one recently and tried it with a maple syrup buttercream which I think worked really well so decided to post the new recipe and video.

The history of carrot cake dates back to the medieval period - from the 5th century to the 15th century. Carrots were used as a sweetener because other sweeteners were scarce at this time. According to 1NutritionFactsGuide.com, carrots contains more sugar than any other vegetables. Originally carrot puddings were more made but from the 1900's the concept of the carrot cake became more popular. During the Second World War when sugar was rationed the carrot cake grew in popularity. It was not until the 1960's that they became commonplace in the United States. Nowadays they are in all coffee shops and cafes.

To watch a  video of me making the cake please click on the video below:


Equipment
Large mixing bowl
Electric mixer
Sieve
Measuring jug
square cake tin 8" by 8"

Carrot cake
150g (5 1/4 oz) dark muscavado sugar
175ml (6 fl oz) vegetable oil/sunflower oil
3 eggs
175g (6 oz) self raising flour
1 tsp bicarbonate of soda
1 tsp ground cinnamon
1/2 tsp ground nutmeg
175g (6 oz) grated carrots
100g (3 1/2 oz) sultanas

Preheat the oven to 180 degrees centigrade (350 fahrenheit or gas mark 4). First beat together the oil, eggs, sugar and beat well until all mixed. Add in the carrot and sultanas and mix together.  Then add in the sieved flour, bicarbonate of soda, cinnamon and nutmeg and mix together.

Pour the mixture into the baking tin. Bake in the centre of the oven (with the oven on a regular (not fan) setting) for about 40 to 45 minutes. Once cooked the cake should feel springy to the touch and a cake tester or tooth pick should come out clean. Allow to cool for about 10 minutes in the tray and then cool on a wire rack. Leave to cool completely before adding the buttercream topping.

Maple buttercream frosting - see alternative cream cheese version below

350g (12 1/4 oz) icing sugar
175g (6oz) softened unsalted butter
3 tbsp maple syrup

 Cream cheese alternative

350g (12 1/4 oz) icing sugar
100g (3 1/2 oz) cream cheese
75g (2 1/2 oz) softened unsalted butter
3 tbsp maple syrup


Sieve the icing sugar and beat in the butter (and cream cheese) and maple syrup with an electric beater (starting very slowly).  It should be smooth and thick and creamy.

Using a palette knife spread the frosting over top of the cake. It should be a generous thick frosting making sure you spread it right to the edge of the cake.

Cut into squares.

Saturday, 3 March 2012

Cherry Madeleines

Madeleines are made using a delicate Genoise sponge. This produces a light sponge which comes from the way the eggs and sugar are whisked together over a gentle heat.  The sponge can collapse easily and to make it a little more robust, cornflour is added.


It is believed that Madeleines date back to the 18th century and that they originate from the Lorraine district of France.  They are traditionally shell shaped and could be named after Madeleine Palmier who was pastry chef Louis XV's  Father-in-law, Stanislaw Leszczynski, King of Poland and Duke of Lorraine.


Watch a video of how to make this cake:


Ingredients
65g unsalted butter
65g plain flour
1.5 teaspoons cornflour
2 eggs
65g caster sugar
0.5 tsp vanilla extract
30g glace cherries


Equipment Required
large bowl
electric whisk
sieve
saucepan
madeleines tin


First melt the butter in a small saucepan and leave to cool.


Then put the eggs, sugar and vanilla extract in a large bowl and place over a pan of simmering water.  Whisk the mixture using an electric whisk until the mixture is thick, pale and has tripled in volume.  It should leave a thick trail as it drops off the whisk.  Remove from the heat and continue to whisk for another couple of minutes until the mixture is cool.

Sift the flours twice and then a third time into the mixture and gently fold it in using a 'figure of eight' movement.  When it is nearly blended pour the cooled butter down one side of the bowl and blend it into the mixture. Then gently stir in the glace cherries.
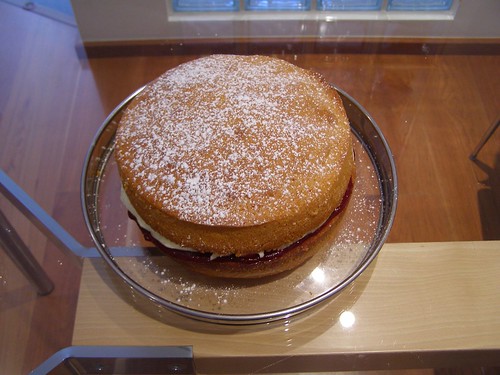
Spoon the mixture gently into the holes of the tin and fill to the top and then bake at 190 degrees Celsius (375 Fahrenheit or Gas Mark 5) for 10 - 12 minutes.  The cakes should be springy and golden.  

Allow them to cool for a couple of minutes in the tin before turning out onto a wire rack to cool.  Dust with icing sugar before serving.

Variations - rather than using glace cherries you could add a tablespoon of cocoa to make chocolate madeleines or add 20g of orange zest and a tablespoon or orange juice for orange madeleines.


Sunday, 19 February 2012

Chocolate cake with fudgey chocolate buttercream


I have had a chocolate cake recipe on here for a while but had not recorded a video.  I got quite a few emails asking for a video so I have updated the recipe and recorded the video below. It is an easy all-in-one sponge mixture and the buttercream has melted chocolate in it which makes it really tasty and creamy and you don't get that bitter cocoa taste you get if you just make buttercream with icing sugar and cocoa.


Here is a video of how to make the cake


Chocolate Cake

Ingredients
200g self raising flour
40g cocoa
1.5 tsp baking powder
200g light muscavado sugar
200g softened butter (at room temperature)
4 eggs
1.5 tsp vanilla extract
60g dark chocolate 

Equipment Required
Large bowl
Electric whisk 
2 8" sandwich tins
sieve
bowl for meting chocolate
saucepan

Put the chocolate in a bowl that fits neatly on top of a saucepan of simmering water and melt the chocolate. While it is melting put everything else into a bowl and when the chocolate is melted add that too. Whisk everything together until it is smooth and combined. If the mixture still seems very stiff then add a couple of tablespoons of milk and whisk again.

Grease the sandwich tins (ideally put some greaseproof paper on the bottom) and then split the mixture between the two tins. Spread evenly but try not to really push the mixture down in the tin and it will make it less light and springy when it cooks. Bake in the oven at 180 degrees Celsius (if you have a fan oven and can turn the fan off then do that - use the normal oven setting). It should take around 30 minutes to cook but check it after 25 and if it is springy then take it out. Leave it to cool for 5 minutes in the tin and then turn out in to a cake rack. Allow to cool completely before adding the buttercream.

Ingredients for chocolate buttercream

200g butter (softened)
200g icing sugar
200g dark chocolate
Equipment required
Large mixing bowl
Saucepan
Bowl for melting chocolate
Electric whisk or wooden spoon

Melt the chocolate over a pan of simmering water as you did for the cake. While it is melting whisk the butter for about 15 seconds and then add the icing sugar and whisk with the butter. Then add the chocolate and whisk again. The buttercream should look creamy and light.
Choose the sponge that has the flattest top and keep it to one side. Put half the buttercream on the other sponge (on the side that was the base) and then put the other one on top. Then carefully spread the rest of the buttercream on top of the other sponge trying not to move it around too much or putting too much pressure on the cake otherwise the buttercream in the middle will come out. You could add the buttercream to the top of the top sponge before sandwiching it on the other - you just have to be careful when picking it up to put it on top.


Sunday, 30 October 2011

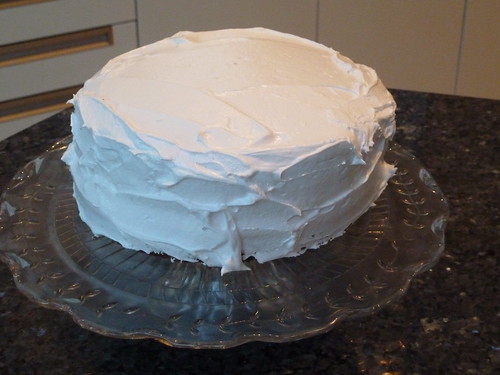
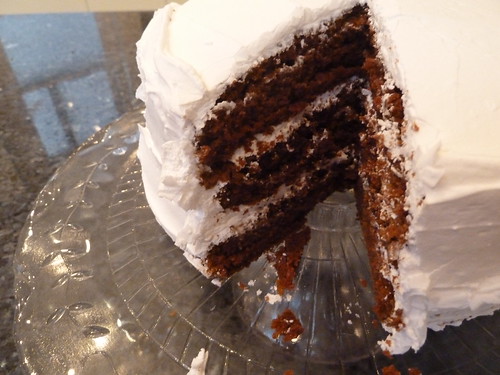
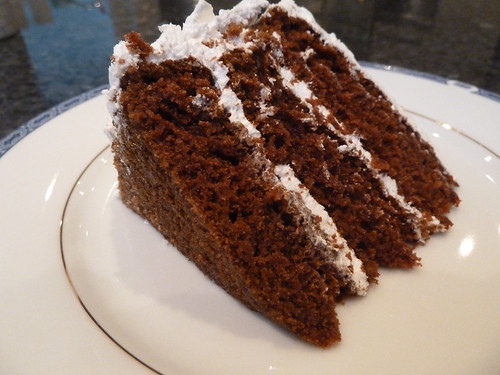
Devil's Food Cake

Devil's food cake is apparently so named because it is the counterpart to the the other classic American Angel food cake which is a light vanilla sponge.  This is a moist and light chocolate cake - very much like a red velvet cake but without the addition of the food colouring to make it red.  It is covered in frosting whether this is chocolate or vanilla is up to your preference.  The recipe here is for a typical American style frosting which is a light marshmallowy frosting.


To watch a video showing you to make the cake please click on the video below:


Equipment required


Three 8"sandwich tins Loaf tin 
Food processor
Large bowl
Sugar thermometer (if available)


Devil's food cake

100g dark chocolate 
175ml boiling water
175g unsalted butter (softened)
300g soft brown sugar 
3 eggs
175ml soured cream 
300g plain flour
1.5tsp bicarbonate of soda
1tsp vanilla extract

Preheat the oven to 190 degrees centigrade (375 Fahrenheit or gas mark 5) and place some greaseproof paper on the bottom of the three sandwich tins lightly grease the rest of the tin.


First break the chocolate into small pieces and put into a saucepan with 175mil of boiling water.  Put on a low hob to melt down.  Once melted remove from the heat and set aside.


Beat the butter and sugar together until it is light and fluffy.  Then add the eggs one at a time and mix together.  Stir in the melted chocolate.


Separately, mix together the soured cream and vanilla extract.  Also sift the flour flour and bicarbonate of soda together.   To the mixture add the soured cream and flour in three batches alternately.  Mix between each batch.  When all mixed together the batter is complete and should be divided until the three tins.  Don't worry that the mixture is quite runny.


Bake in the pre-heated oven (not on the fan setting) for 20-25 minutes.  When cooked and springy to the touch cool briefly in the tin sand then turn onto a wire rack to cool.


Vanilla frosting
2 eggs whites
500g granulated sugar
300ml water
large pinch of cream of tartar


Put the sugar and water together into a saucepan over a low heat until the sugar has dissolved.  Whilst this is happening whisk the egg whites until you have stiff peaks.


Once the sugar has dissolved increase the heat.  The sugar mixture has to get to 118 degrees Centigrade or 240 degrees Fahrenheit.  Ideally use a sugar thermometer to check the temperature but if you do not have one boil it until it very slightly starts to darken in colour and drop a small amount of cold water into it and you should see it form a soft ball.  Take the saucepan off the heat and add in a large pinch of cream of tartar and whisk until the mixture goes cloudy.


Pour the syrup into the whisked eggs and whisk continuously.  Keep whisking until the frosting thickens and loses its shininess.


Spread a layer of the frosting on one of the cakes and sandwich another on top.  Then repeat with the final sponge.  Use the cake with the flattest top for the top sponge. Then cover the top and all of the sides in the frosting so that the cake is completely covered.  You could decorate the top of the cake with chocolate curls or similar or just leave it as it is.


Although there is a lot of frosting, American frosting is much lighter than butter cream and so it doesn't seem too heavy at all.

Sunday, 20 March 2011

Battenburg cake


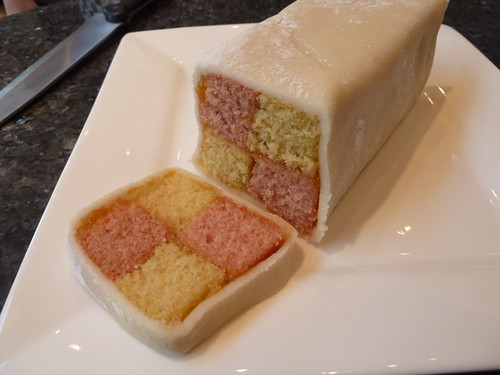
The origin of the Battenburg cake is not clear but it is claimed that the cake was created in honour of the marriage of Queen Victoria's granddaughter to Price Louis of Battenburg.  The four squares representing the four Battenburg princes.


To watch a 10 minute video of how to make the Battenburg cake you can see my video on YouTube click here for Part 1 and click here for Part 2, or below:


Equipment required
Battenburg tin or an 8" square tin
Large mixing bowl
Electric mixer
Sieve

Battenburg cake
175g golden caster sugar
175 unsalted butter - at room temperature
175g self-raising flour
3 eggs lightly beaten
1 tsp vanilla extract
drop of milk
few drops of pink food colouring

Apricot jam to stick the cake together

If you want a specific Battenburg tin go to the decuisine website which is where I got mine from.  It has four sections for the pink and regular sponge.  Otherwise use an 8" square tin and divide it in two with a thick piece of tin foil.  Preheat the oven to 180 degrees centigrade (350 fahrenheit or gas mark 4). 

First cream together the caster sugar and the butter until light and fluffy.  Then add half of the lightly beaten eggs and mix well.  Before adding the rest of the eggs add one tablespoon of flour to stop the mixture from curdling.  Then add the remaining eggs and beat together.  Sieve the flour into the mixture and fold in with a metal spoon or spatula.  Measure an eggcup full of milk and add the vanilla extract and then add this to the mixture and stir in.  

Then divide the mixture in two and in one bowl add some drops of pink food colouring until the mixture is a nice pink colour.  You should now have equal amounts of pink and regular cake mixture.  If you are using the Battenburg tin fill two sections with pink mixture and two with regular or if you are using a square tin with a divide put pink in one side and regular in the other and bake for 20-25 minutes until springy to the touch.

Once cooked allow to cool.  Remove from the tin and if using the square tin cut each sponge in half so you have two pink sponge strips and two regular sponge strips.

Before making the marzipan (or using ready rolled) put the cake together.  Put a few tablespoons of apricot jam in a bowl and mix vigorously so that it is smooth and spreadable.  First take a pink strip and regular strip and brush one side with apricot jam and then stick the regular sponge to it to make the base.  then put apricot jam on the top of both sponges and the inside of the other pink sponge.  Place the pink sponge on top of the regular one and the regular one on the bottom pink one and stick them all together.

Marzipan

There is plenty of pre-made and even ready rolled marzipan available but it is simple to make and much tastier than factory made marzipan.

100g icing sugar
100 g caster sugar
200g ground almonds
1 egg plus one egg yolk
1 tablespoon lemon juice
few drops almond extract

Sieve the icing sugar and caster sugar into a large bowl and mix in the ground almonds.  Then add in the remaining ingredients and mix all together until it all comes together and bowl is clean.  Use your hands to mix it together.

Dust the work surface with icing sugar and then knead the marzipan for a few minutes until it feels smooth.  The roll out until about 1 cm thick trying to ensure it doesn't stick to the work surface.

Then brush apricot jam in the middle of the marzipan the size of the cake and sit the cake on it.  Brush the sides of the cake and top with the jam and then fold one side of the marzipan on the cake and then carefully do the other side so that it meets on the top (which will become the bottom).  Cut any overlapping marzipan and crimp together so the join is less visible.  Trim each end and then turn over so the join is on the bottom and you have one finished cake!

Saturday, 26 February 2011

Carrot cake with cream cheese frosting


The history of carrot cake dates back to the medieval period - from the 5th century to the 15th century. Carrots were used as a sweetener because other sweeteners were scarce at this time. According to 1NutritionFactsGuide.com, carrots contains more sugar than any other vegetables. Originally carrot puddings were more made but from the 1900's the concept of the carrot cake became more popular. During the Second World War when sugar was rationed the carrot cake grew in popularity. It was not until the 1960's that they became commonplace in the United States. Nowadays they are in all coffee shops and cafes.

To watch a 10 minute video of how to make my version of the carrot cake with a cream cheese topping you can see my video on YouTube click here, or below:


Equipment required
Greaseproof paper and a rectangular cake tin (approx 9" X 13")
Large mixing bowl
Electric mixer
Sieve
Measuring jug

Carrot cake
150g caster sugar
150g light brown sugar
300ml vegetable oil
4 eggs
225g plain flour
2 tsp vanilla extract
2 tsp baking powder
1 tsp bicarbonate of soda
2 tsp ground cinnamon
pinch salt
250g grated carrots
75g raisins

Preheat the oven to 180 degrees centigrade (350 fahrenheit or gas mark 4). First beat together the oil, eggs, sugars and beat well until all mixed. Then add in the sieved flour, baking powder, bicarbonate of soda, cinnamon and salt and mix together. Finally stir in the carrots and raisins.

Pour the mixture into the baking tin which should have the based lined with greaseproof paper. Bake in the centre of the oven (with the oven on a regular (not fan) setting) for about 35 to 40 minutes. Once cooked the cake should feel springy to the touch and a cake tester or tooth pick should come out clean. Allow to cool for about 10 minutes in the tray and then cool on a wire rack. Leave to cool completely before adding the cream cheese topping.

Cream cheese frosting

450g icing sugar
190g cream cheese
75g softened unsalted butter
2 tbsp maple syrup

Sieve the icing sugar and beat in the butter with an electric beater. Then add the cream cheese a bit at a time and beat together. Finally add in the maple syrup stir into the mixture. It should be smooth and thick and creamy.

Using a palette knife spread the frosting over top of the cake. It should be a generous thick frosting making sure you spread it right to the edge of the cake.

Cut into squares.

Tuesday, 1 February 2011

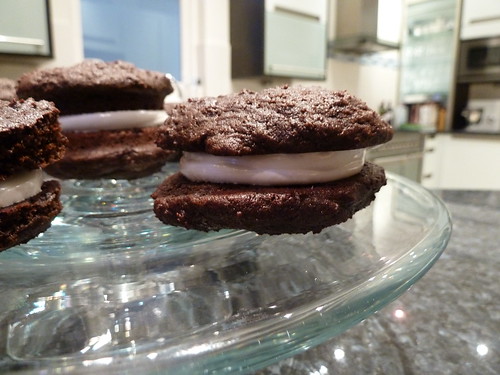
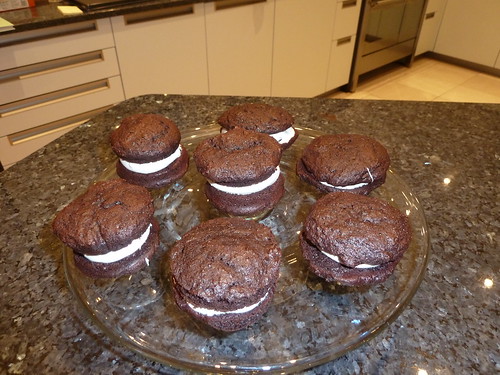
Chocolate whoopie pie with fluffy marshmallow filling

P1000197
P1000192


The whoopie pie has its origins in the US in the 1920's. They are well known for being a staple element of the packed lunch of the Amish community in Pennsylvania for decades. No one seems to know why they are called 'whoopie pies' as they are certainly not a pie! It is basically two soft cookies (or really a cross between a cookie and a cake) sandwiched together with some icing or cream in the middle. There are loads of different variations of cookie and of filling but the recipe below is for a chocolate whoopie with a fluffy marshmallow filling.

Personally I love whoopie pies as it is a bit like having a mini cake just to yourself. The filling much lighter than buttercream and the cookies are like a light cake/cookie.

To watch a 10 minute video of how to make the whoopie pies and filling on YouTube click here, or below:


Equipment required
Greaseproof paper and a baking sheet or a whoopie pie tin
Large mixing bowl
Electric mixer
Sieve

Chocolate whoopie
200g caster sugar
125g unsalted butter
1 large egg
1tsp vanilla extract
125ml buttermilk
180g plain flour
90g cocoa
1.5 tsp bicarbonate of soda
0.5 tsp baking powder
pinch salt

Preheat the oven to 180 degrees centigrade (350 fahrenheit or gas mark 4). First cream the butter and sugar together with an electric mixer until light and fluffy. Then add the egg, the buttermilk and the vanilla extract and beat together - the mixture will be very runny at this stage.
In a separate bowl sieve together the flour, cocoa, bicarbonate of soda and baking powder and add a pinch of salt. Mix together.
Then add half of the dry ingredients to the mixture and stir together. I find it easier to do this by hand as the mixture will become very thick. Once that is all mixed together add the rest of the dry ingredients and mix together again. This will become like a thick cookie dough mixture. Once it is all mixed together put it in the fridge for 30 minutes to chill.
Once chilled, form the mixture into golfball sized piece and place on greaseproof paper on a baking tray, leaving enough room for them to expand when cooked. You can make them bigger or smaller as you wish but try and make them consistent sizes. With the above recipe I would normally make about 9 whoopies (so 18 'cookies').
Place in the oven and cook for around ten minutes. The whoopies should be soft but slowly spring back when pressed. Leave for a minute or two in the baking tray and then cool on a wire rack.

Fluffy marshmallow filling

3 egg whites
150g caster sugar
2-3 tbsp golden syrup
1tsp vanilla extract

Put all the ingredients in a heatproof bowl and place over a saucepan of simmering water. With an electric whisk (or hand whisk, but this will take time) whisk everything together. The purpose of the heat is to help the sugar dissolve. After a while once the mixture starts to thicken you can remove the bowl from the heat and finish whisking until the mixture is thick and holds its shape - so if you tip the bowl up it does not move.
Dollop a generous spoonful of the filling onto the base of one of the whoopies and sandwich it together with another. Serve straight away.


Sunday, 1 November 2009

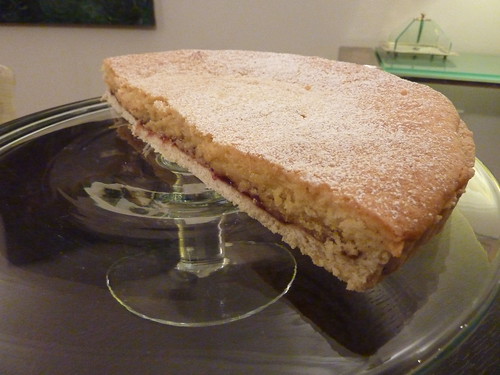
Bakewell Tart

The Bakewell tart is a traditional English dessert or cake that has developed from the Bakewell Pudding, although the modern tart is quite different form the original pudding. Bakewell is a small town in Derbyshire, England and local legend has it that it was eaten as far back as the 1500s at Haddon Hall. More popular belief is that the actual appearance of the Bakewell Pudding was 300 years later in the 19th century.

The Bakewell Pudding was first created in the 1860s when Bakewell's coaching inn was the White Horse. The White Horse was built in 1804 on the site of an earlier inn. Back in the coaching days it was the landlady of the White Horse, Mrs Greaves, who usually did the cooking but on the monumental day, when entertaining important guests, the task of making a strawberry tart was left to an inexperienced assistant. The egg and sugar were omitted while making the pastry. Then the jam was spread over the unusual pastry base, and the egg and sugar mixture was put on top and an extra (secret) ingredient was added. The customers liked this new sweet, and the rest is history.

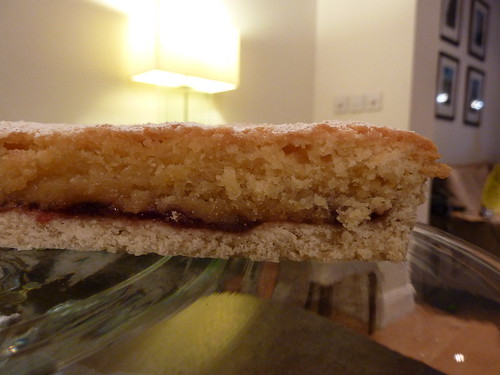
Modern day Bakewell tart consists of a shortcust pastry base, spread with jam and covered with a sponge-like filling enriched with ground almonds (known as frangipane).

The thing I like about bakewell tart is that it makes a great warm dessert with cream or custard but is equally good as a nice slice of ‘cake’ with afternoon tea. My recipe is a combination of different recipes and techniques but I think makes the perfect Bakewell Tart.

To watch a 10 minute video of how to make the tart on YouTube click here, or on the blog posting:


Equipment required
Greased 10inch tart tin or flan dish
Large mixing bowl
Electric mixer (or wooden spoon and elbow grease!)
Sieve

Sweet Pastry
Buying ready-made pastry is perfectly acceptable these days (even Delia Smith says so in her book ‘How to cheat at cooking’). However if you want to make your own pastry here is a recipe for a nice dessert or sweet pastry:
125g unsalted butter
90g golden caster sugar (regular caster sugar is fine)
250g plain flour
1 egg

To make the pastry, sift the flour into a mixing bowl and stri in the sugar. Ten rub in the butter using the tips of your fingers. When the mixture resembles breadcrumbs add the lightly beten egg a bit at a time to bring it together to a smooth dough. It should leave the bowl clean but not be sticky. If you have added too much water then add a little more flour. Knead it for a couple of minutes and then leave it to rest in the fridge for 30 minutes in a polythene bag or cling film.

Once rested roll out the pastry so it is slightly bigger than the dish you are using. Carefully line the dish with the pastry ensuring there are no gaps. Overlap the edges by about 1 inch as the pastry will ‘shrink’ when it is cooked. ‘Blind-bake’ the pastry for about 20 minutes i.e fill the pastry case with baking beans if you have them and bake the pastry so that you do not end up with soggy pastry when the tart is cooked.

Once the pastry has been blind-baked take it out of the oven and leave it to cool (it is not essential it is completely cold before the next stage).

Filling

6oz (150g) caster sugar
6oz (150g) soft margarine
3 eggs
6oz (150g) self-raising flour
½ teaspoon almond essence
1 egg-cup milk
strawberry jam
20z (50g) grated marzipan

Cream the margarine and sugar together using a wooden spoon or electric mixer until light and fluffy. Add the eggs one at a time and beat into the mixture. It is a good idea to add one tablespoon of flour before the last egg to stop the mixture separating. Mix the almond essence with the milk and beat in to the mixture. Then fold in (using a metal spoon with a figure of 8 movement) the remaining flour.

Mix a few tablespoons of jam in a bowl so that is becomes runny and then spread this on the pastry case. Cover the entire base. Then add the grated marzipan on top of the jam. It looks like you are adding cheese but don’t be put off!. Then spoon in the frangipane filling ensuring no jam or marzipan is visible. Add it carefully so that you so not mix the jam or marzipan into the mixture but it stays under the frangipane.

Bake in the oven at 200 Centigrade (400 Fahrenheit, gas mark 6) for 20 minutes and then turn it down to 180 centigrade (350 Fahrenheit, gas mark 40 for a further 15 minutes. The sponge should be firm but ounce back up when you press it. Some people like to add pastry to the top or even ice the tart but I think it is great as it is.

Saturday, 24 October 2009

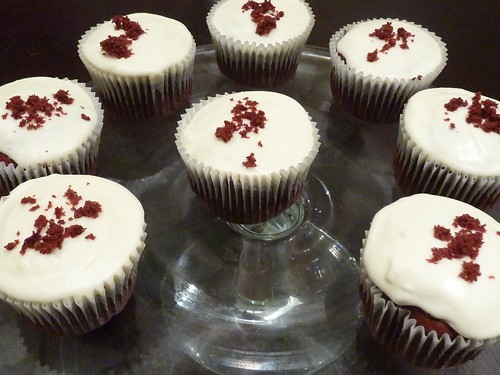
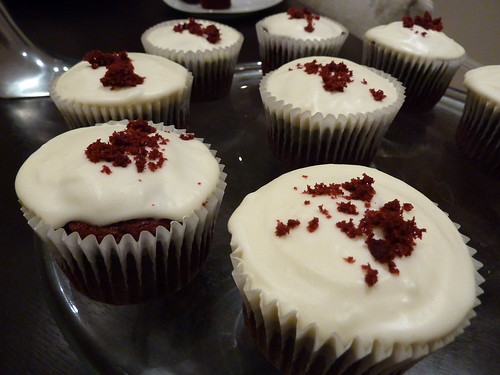
Red Velvet Cupcakes

Watch a 10 minute video on how to make these cupcakes by clicking here to watch on YouTube or watch on the blog posting:


red velvet cupcakes


Red velvet cakes are an american tradition with cream cheese frosting. They were made famous in the film Steel Magnolias when they were featured as a wedding cake and are a very popular cake made by The Hummingbird Bakery. Below is a recipe for red velvet cupcakes with cream cheese frosting.


cupcake


Ingredients
90g unsalted butter, softened
225g caster sugar
2 medium eggs
30g cocoa
1/2 tsp vanilla extract
40ml red food colouring
225g self-raising flour
3/4 tsp bicarbonate of soda
165ml buttermilk


Equipment required
large mixing bowl
sieve
electric whisk
muffin cases
muffin tin

Beat the butter and sugar together using an electric whisk until light and fluffy. Add the eggs one at a time and continue to beat together.
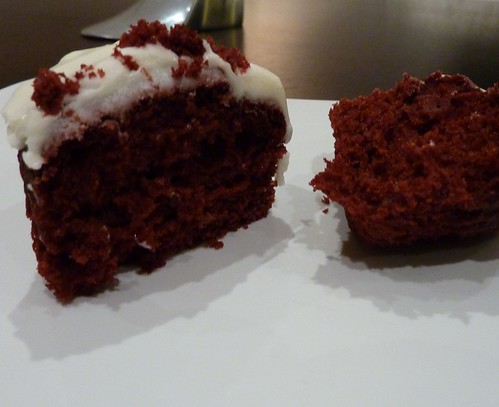
In a separate bowl mix together the cocoa, vanilla essence and food colouring. It does seem a lot of food colouring but dont worry about it! Mix them together so that it becomes a dark coloured paste. Add to the butter/sugar/egg mixture and beat together. Then add half of the buttermilk, beat together, add half the flour, beat together and then repeat this process. You will then just have the bicarbonate of soda left. Add this and beat slowly to start with and then increase the speed so that everything is mixed together and you should have a lovely deep red mixture.

Divide between the muffin cases - this recipe should make about 18 cupcakes. Fill the cases about 2/3 full. Bake on the middle shelf of the oven for around 20 minutes on 170C or 325F or gas mark 3. The cakes should be springy to the touch when properly cooked. Remove and cool on a wire rack.

Creamcheese frosting
Ingredients
200g cream cheese
75g unsalted butter, softened
450g icing sugar
1tbsp warm water
1 tsp vanilla essence

Beat together the sugar and butter with the water. Then add all of the cream cheese and beat together until smooth and glossy. Add the vanilla essence and mix together. Using a spoon top the cupcakes with the frosting. A nice touch is to crumble one of the cupcakes and sprinkle a little of the crumbs on top of the cake for decoration.

Tips
Try and use a deep muffin tin if you have one - this keeps the cupcakes in shape in their muffin cases while cooking.
Don't be put off by the amount of food colouring that is required - it gives the cake the deep red colour.

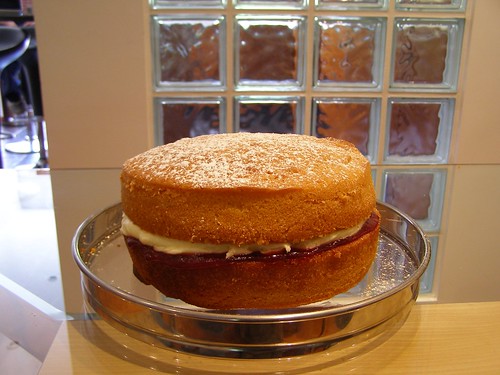
Back to Basics - Victoria Sponge

The most popular recipe on the blog so far is this traditional and evergreen classic for Victoria Sponge.

To watch a 10 minute video of how to make the cake on YouTube click here, or on the blog posting:


Victoria Sponge
The traditional British Victoria Sponge was named after Queen Victoria of England (1819 – 1901). One of Queen Victoria’s ladies-in-waiting Anna, the Duchess of Bedford, is said to have been the creator of ‘teatime’. Because lunch was traditionally served at midday, the Duchess often became peckish about four o'clock in the afternoon. 

The Duchess spent most summers at Belvoir Castle in Leicestershire. It became common practice for friends to join the Duchess for an additional afternoon meal in her rooms at Belvoir Castle. The menu consisted of small cakes, bread and butter sandwiches, assorted sweets, and, of course, tea. This summer practice proved so popular, the Duchess continued it when she returned to London, sending cards to her friends asking them to join her for “tea” The practice of inviting friends to come for tea in the afternoon was quickly picked up by other social hostesses. 

Queen Victoria adopted the new craze for tea parties. By 1855, the Queen and her ladies were in formal dress for the afternoon teas. Rather than having lots of small individual cakes this simple large cake became on the Queen's favourites. After her husband, Prince Albert, died in 1861, Queen Victoria spent time in retreat at her residence Osborn House on the Isle of Wight. According to historians, it was here that the cake was named after her.


Today the Victoria Sponge is seen to be a simple basic cake to make. Traditional English fetes and Women’s Institutes often have a ‘bake-off’ for the best Victoria Sponge. I believe that a good Victoria Sponge is one of the best cakes but all too often they are not made well and is just a flat heavy sponge rather than the light and fluffy sponge that it should be, sandwiched together with strawberry or raspberry jam and buttercream. I have tried a number of recipes and have come up with the one I think works the best. It is a simple all-in-one recipe that uses a higher quantity of ingredients than most other recipes. With the right amount of baking powder you end up with a well-risen light sponge that looks great.

Victoria Sponge Ingredients
285g Self-raising flour
2.5 teaspoons (12.5ml) Baking powder
285g Margarine
285g Caster Sugar
5 Eggs
Raspberry or Strawberry Jam

Buttercream Ingredients
150g Softened Butter
340g Icing Sugar
3 tablespoons (45ml) Warm water

Equipment required
2 greased 8-inch sandwich tins
Sieve
Large mixing bowl
Electric whisk

Cake
- Sieve the flour and baking powder into a large bowl
- Add all the other ingredients into the bowl
- Using an electric whisk beat the ingredients together, starting slowly then medium until you get a smooth, creamy consistency
- Divide the mixture between the two sandwich tins and bake at 170 degrees centigrade (340 degrees Fahrenheit) for 30-40 minutes. The cake should be springy to the touch.
- When cooked immediately turn out onto a wire rack.

Buttercream
- Soften the butter and beat until smooth
- Gradually add the icing sugar, beating well
- Add the water and beat until smooth

Spread some jam on one half of the sponge and buttercream on the other and sandwich together. Sieve icing sugar on top

Tips
My tips for a good Victoria Sponge are:
1) Use good quality 8-inch sandwich tins. Line them with greaseproof paper to avoid the cake sticking
2) If you have a fan oven, do not use the fan feature. Cakes cook much better on the traditional oven setting
3) Be careful not to use too much jam or buttercream otherwise the cake may slide apart when sandwiched together. Do however spread the jam and buttercream to the edge of the sponges as this will enhance the appearance of the cake
4) When turning out the cakes onto the wire rack, try turning one out onto a solid surface (like a chopping board) and then put it on the wire rack so that the top of the cake does not get the marks from the wire rack. This will make it look much better.


Victoria Sponge

Friday, 24 August 2007

‘Flame’ Cupcakes

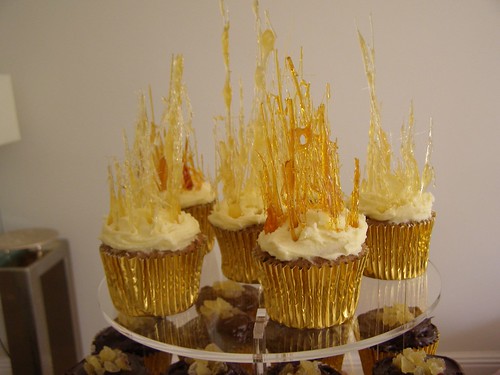
You will see from the photos and posting below that I recently made some cupcakes for a friend’s 40th birthday party. As well as the chocolate cupcakes featured above I made some ‘flame cupcakes’ that I put on the top of the cakestand. These looked great and everyone asked me how I made them. As the creation was to replace an actual birthday cake, they had the appearance of flames on the top of the cakestand.

I used a maple cupcake sponge with maple syrup buttercream and then made the sugar flames for the top. This isn’t the easiest thing to do but with some patience and a lot of trial and error you can make some dramatic cakes.

The recipe and instructions are set out below. This will make 12 cupcakes. As to get some really good ones there is a bit of trial and error I suggest making all 12 even if you end up with only 4 or 5 really good flame cakes. The others are tasty even without the sugar shards:

Maple Cake Ingredients
60g butter, softened
150g self-raising flour
1 teaspoon cinnamon
110 g dark brown sugar
60ml maple syrup
2 eggs
Maple Buttercream Ingredients
90g butter, softened
160g icing sugar
3 teaspoons maple syrup
Sugar Flames
330g caster sugar
250ml water
Equipment required
1 12-hole muffin pan tray
muffin cases
large heavy based saucepan
sieve
large mixing bowl
electric whisk
• First preheat the oven to 180 degrees Celsius or 160 if it is fan assisted.
• Put the muffin cases in the muffin tray
Cakes
•Put butter, sieved flour and cinnamon, sugar, maple syrup and eggs in a large mixing bowl and beat with an electric mixer on slow speed until all the ingredients are mixed together. Increase the speed until the mixture becomes paler.
• Divide the mixture amongst the 12 muffin cases and bake for 20-25 minutes until the cakes start to brown and are firm to the touch.
Buttercream
While the cakes are cooking you can make the buttercream but it shouldn’t be put on the cakes until they are cool (which won’t take long).
• Sieve the icing sugar into a large bowl and beat in the softened butter and maple syrup. I find using a metal the spoon the easiest way to do this, pushing the butter against the bowl using the back of the spoon. Eventually it will all come together in a nice creamy buttercream.
• Using a teaspoon spread the buttercream generously on top of the cakes.
Sugar Flames
Now for the fun bit!
• Combine the sugar and water in a heavy based saucepan.
• Stir over the heat continuously until the sugar dissolves being careful that it does not boil.
• Once all the sugar has dissolved bring it to the boil. Then reduce the heat and leave the liquid to simmer.
• The liquid will start to become golden brown. This will take quite a while (maybe 20 minutes) but it must become this colour before making the flames. If you have a candy thermometer then the mixture should be between 138 degrees Celcius and 154 degrees Celsius. It is not essential to have one however as it is the colour that tells you it is ready to use.
• Remove from the heat and allow the bubbles to subside.
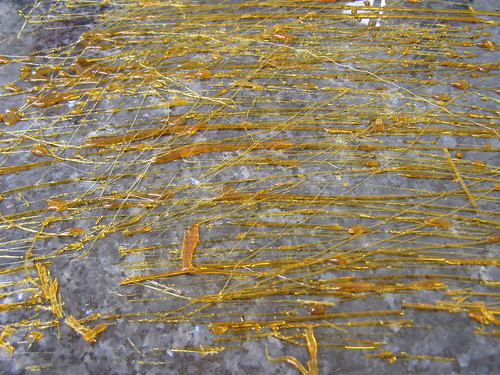
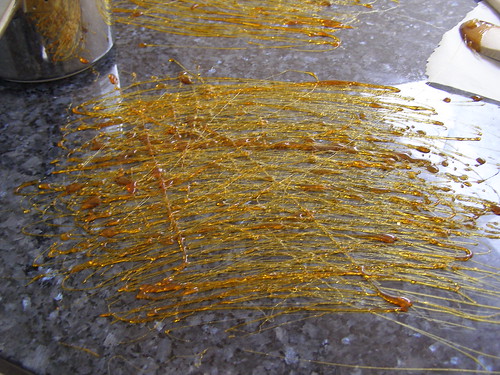
• I then use a granite worktop but you could just use greaseproof paper or a glass chopping board to make the shards. Dip a wooden spoon in the mixture and then drizzle it on to the granite worktop or greaseproof paper moving the wooden spoon back and forth. Here are some photos of the drizzled sugar.
• Allow the sugar to set at room temperature and then using a sharp knife or a metal spatula. It will break up so just keep lifting some off and you get some long strands. Arrange it on the cake with shorter shards at the back and longer ones at the front to give a dramatic effect.
Tips
My tips for these cakes would be:
• Make plenty of sugar shards and work then quickly. Drizzle the sugar syrup and then start to try and lift it fairly quickly to see if it is set. If it is left for too long it goes too brittle.
• Don’t make them more than a day ahead – the next day the sugar starts to melt a bit and they don’t look good. It is fine to make the morning of an afternoon or evening party.
• Place the shards firmly into the buttercream and the cake so that they don’t fall over.


Making the sugar flames


Saturday, 11 August 2007

Fabulous Chocolate Brownie Cupcakes


This recipe will make 20 cupcakes. The base is like a brownie mixture which is then topped with a great creamy ganache and chocolate curls.

Chocolate Brownie Cakes Ingredients
250g butter, chopped
150g dark eating chocolate (Bournville or similar)
440g caster sugar chocolate
250mil water
225g plain flour
40g self-raising flour
25g cocoa powder
2 eggs

Ganache Ingredients
300ml double cream
400g dark eating chocolate

Decorations
200g milk chocolate
200g white chocolate
Glace ginger (optional)

Equipment required
2 12-hole muffin pan trays
muffin cases
large heavy based saucepan
sieve
large mixing bowl
electric whisk

• First preheat the oven to 170 degrees Celsius or 150 if it is fan assisted.
• Put the muffin cases in the muffin tray
Cakes
• Put butter, chocolate, sugar ad water in a saucepan. Melt together on a slow heat, stirring all the time. The mixture will become smooth. Once it is all smooth pour it into a large mixing bowl and leave it to cool for 15 minutes.
• Sift the flours and the cocoa powder and whisk them into the chocolate mixture with an electric whisk
• Whisk the eggs into the mixture
• Don’t worry that the mixture seems runny still. It is like a brownie mix so it is meant to be like that
• Pour the mixture into the muffin cases. These cakes don’t rise hugely so fill the muffin cases to about two-thirds full (but no more). You don’t want them too high as you have to put the ganache on top
• Bake cakes for about 35 minutes

Ganache
While the cakes are cooking you can make the ganache as it needs time to get to the right consistency
• Coarsely chop the chocolate and put into a large bowl
• Pour the cream into a heavy-based saucepan and put on a gentle heat
• Heat until it starts to boil
• Pour over the chocolate and keep stirring until smooth. It may go a slightly strange consistency to start with but be patient and it will become a lovely glossy consistency
• Cover the bowl with cling-film and refrigerate for at least 30 minutes (an hour if you have time)

Decorating
It is important that the chocolate is at room temperature and has not been kept in the fridge to make the chocolate curls. Personally I think that a combination of white and milk chocolate look great on these cupcakes but I have also used just dark chocolate. Use whatever you think looks good. I have also used chopped glace ginger which looks and taste great

To make the chocolate curls, use a simple vegetable peeler and using reasonable force scrape along the long side of the chocolate bar.

Once the ganache has a nice spreadable consistency, spread it generously on each cake and immediately add plenty of chocolate curls or glace ginger.

Tips
My tips for these cakes would be:
• Try and use big muffin cases and gold or silver ones really make the cakes look special
• Make sure the ganache has become thicker and spreadable (consistency of chocolate spread) before using it otherwise it will run down the sides
• Use plenty of chocolate curls to make they look extravagant
• Try and have something great to serve them on – like a great tiered cake stand or a large white plate
Related Posts Plugin for WordPress, Blogger...